

Raster to Vector: Turn Blurry Logos Into Editable Artwork
Learn how raster to vector conversion rebuilds blurry logos. Explore tracing options, editable formats, and practical checks for your print or sign project.


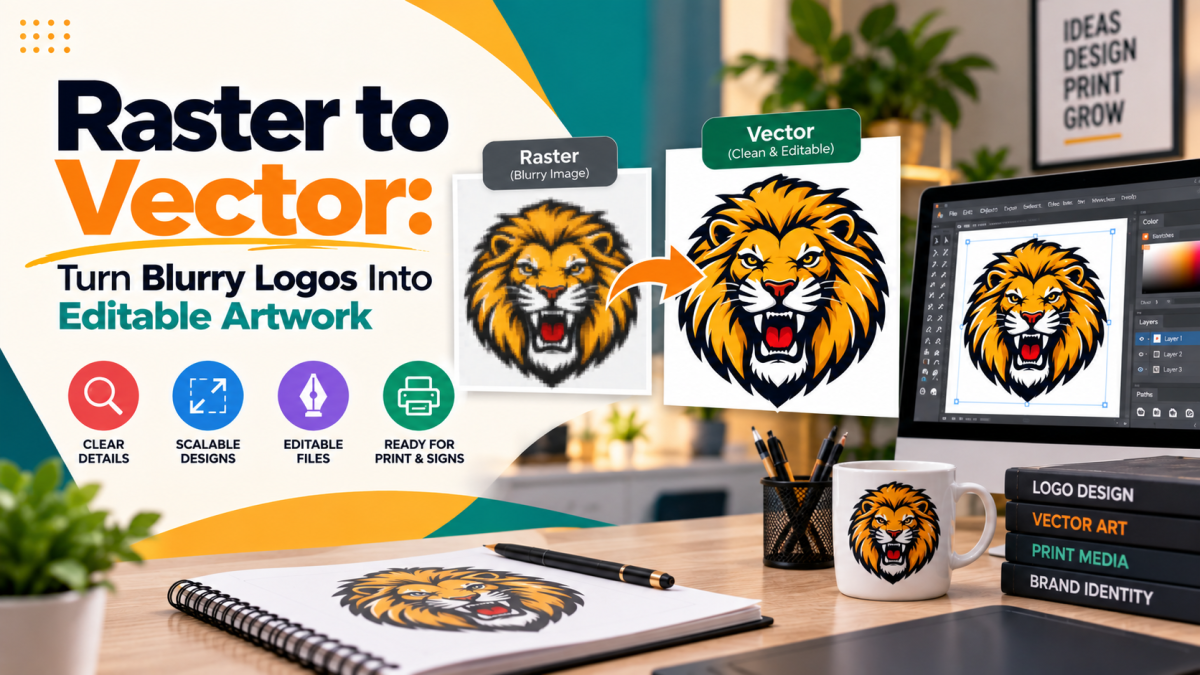
A blurry logo can hold up a print order, especially when the original design file is missing. We explain how to convert raster to vector by rebuilding pixel artwork into editable shapes. You will learn
which conversion method suits your image, what details need attention, and how to prepare a useful file for your supplier.
At iDigitize, we provide manual vector tracing for logos, sketches, lettering, and other artwork. Our service includes artwork for printing, signage, and promotional products. We recommend starting with your intended use, because a design prepared for a banner may need different adjustments for a small vinyl decal.
What Changes During raster to vector Conversion?
Conversion replaces pixel shapes with mathematical paths and c
urves. These vector objects can be resized without the pixelation that occurs when a small raster image is enlarged.
Raster formats such as JPG and PNG store pictures as grids of pixels. Vector artwork stores information about shapes, their outlines, and their appearance. Adobe identifies vectors as useful for logos and illustrations that need to work at different sizes.
We also want to clarify an important limit: conversion does not reveal details that were never visible in the source. Unreadable lettering or a damaged symbol needs a reference or your instructions.
The goal is to recreate the intended design, rather than
trace every flaw in the picture.
Is Your Image Suitable for Conversion?
We recommend assessing the design before choosing a tool or placing a
n order.
Simple logos, flat illustrations, icons, and clear lettering are good candidates. These designs have boundaries that can be rebuilt as separate shapes.
A photograph is less straightforward. Skin texture, reflections, and subtle shadows may require many objects or a simplified artistic treatment. If you need a realistic photograph, a suitable raster file may serve you better.
Consider what you want to edit afterward. Changing a logo’s color or resizing a symbol is a practical reason to create vectors. Converting a photograph solely because the file sounds more professional is rarely a useful goal.
Why Automatic Tracing Sometimes Mis
ses the Mark
Automatic raster to vector tracing interprets the visible pixels, including defects in the source.
A compressed JPG may contain small marks around letters. A tracing tool can mistake those marks for parts of the design. Uneven edges can become uneven paths, while faint details may disappear.
We suggest testing automatic tracing when the image has strong contrast and simpl
e shapes.
Manual rebuilding is useful when precise geome
try or lettering matters. Adobe recommends manually constructing exact geometric shapes and identifying the original font when vectorizing text.
At iDigitize, our conversion service uses manual tracing. We recreate artwork as editable shapes rather than relying on an automatic result alone.
How to Rebuild Your Design in Five Steps
Understanding how to convert raster to vector is easier when you separate preparation, drawing, and inspection.
1. Find the Best Available Original
Look for the largest, clearest version of your artwork. An original attachment is usually more useful than a screenshot from a social profile.
We recommend checking old design folders and asking your previous designer whether an editable file already exists.
If the image is all you have, provide it without unnecessar
y cropping or filters.
2. Identify What Must Stay Accurate
Write down the correct wording, required colors, and any distinctive details.
We recommend providing a font name when available. If you do not know the font, include another clear example of the lettering.
Explain whether the artwork should be reproduced faithfully or simplified for a particular product. These are different instructions.
3. Choose Your Drawing Method
You can test Adobe Illustrator’s Image Trace by placing the image, opening the tracing panel, choosing a preset, and adjusting the settings.
For manual work, rebuild the artwork with shape and drawing tools. Use separate objects for meaningful elements.
We recommend preserving the original image as a reference while you work, so you can compare proportions and alignment.
4. Clean the Paths and Lettering
Check curves, corners, spacing, and the gaps inside letters.
Remove unwanted objects and unnecessary anchor points. However, do not simplify so heavily that a distinctive curve changes shape.
We recommend viewing the design at both a large zoom and its intended output size. An enlarged view reveals rough paths; the actual size shows whether small details remain readable.
5. Save a Master and Check the Export
Keep an editable master before creating delivery files.
Export the format your supplier requests, then reopen that export in compatible software. We recommend checking dimensions, appearance, and whether the artwork contains usable vector objects.
Keep a preview image alongside the master so you can identify the design easily.
Match the File to the Production Met
hod
The best raster to vector deliverable depends on who will receive the artwork.
|
Project |
Possible format |
What we recommend confirming |
|
Further design editing |
AI or CDR |
Software and versio n compatibility |
|
Printing |
PDF, EPS, or AI |
Supplier specifications and color requirements |
|
Website graphics |
SVG |
Supported features and display behavior |
|
Vinyl cutting |
SVG, AI, or DXF |
Accepted paths, dim ensions, and units |
|
Sharing a preview |
PNG or JPG |
Suitable resolution and background |
These are starting points, not universal rules. Your supplier’s requirements should guide the final choice.
We also recommend checking the file contents. A PDF or SV
G can contain an embedded raster picture. The extension alone does not prove that the artwork has been rebuilt.
Small Details That Matter Before Production
Successful raster to vector work needs more than clean edge
s.
We recommend checking these details before approval:
-
Lettering matches the correct spelling and style.
-
Narrow gaps remain visible at the finished size.
-
Background objects are included only when n
-
eeded.
-
Colors follow your supplied references.
-
Cutting paths contain no unintended duplicates.
-
Important shapes have not shi
-
fted during cleanup.
For example, a small gap between two letters may look clear on screen but become difficult to reproduce on a deca
l.
If the artwork will become embroidery, keep the next stage in mind. Vector shapes provide a design reference, but embroidery digitizing must still define stitches, sequencing, and other machine instructions.
Make Your Artwork Easier to Reuse
At IDigitize, we offer manual artwork co
nversion for customers who need editable vector files. A useful raster to vector result should preserve your intended design and support its next application.
Send us your clearest image, intended use, finished dimensions, and preferred format. Include any font or color references so your request gives us a clear starting point.
Frequently Asked Questions
Can I Convert a Logo From a Screenshot?
Yes, a screenshot can be used as a reference, but the result depends on how clearly the design appears. We reco
mmend supplying the original image whenever possible. If letters or symbols are unclear, another reference can help prevent incorrect details from being introduced during rebuilding.
How Can I Learn how to convert raster to vector Without Buying Software?
You can begin with a free vector edit
or such as Inkscape, which includes bitmap tracing. We recommend practicing on a simple symbol before trying detailed lettering. Compare the result with your original and learn how to adjust paths, since automatic tracing still needs inspection and cleanup.
Does Increasing the Resolution Create a Vector Image?
No. Increasing the pixel dimensions produces another raster image. We explain conversion as rebuilding the artwork with paths and shapes. A larger JPG may be useful for some purposes, but it does not provide the same editable objects as a genuine vector design.
Should Fonts Be Converted to Outlines?
Outlined lettering can help preserve its appearance when the receiving computer does not have the font. We recommend confirming your supplier’s requirements and keeping a separate master with editable text. Once lettering becomes outlines, you edit the letter shapes rather than typing new words.









Comments (0)