Fountain Basin Installation: A Step-by-Step Guide
 Robert Micheal
Installing a fountain basin correctly is essential for creating a reliable and attractive outdoor water feature. A poor installation can lead to uneven water levels, leaks, pump problems, and unnecessary maintenance. With careful planning and the right preparation, many smaller fountain basin projects can be completed successfully.
This guide explains the basic installation process, from choosing the location to testing the completed fountain system.
What Is a Fountain Basin?
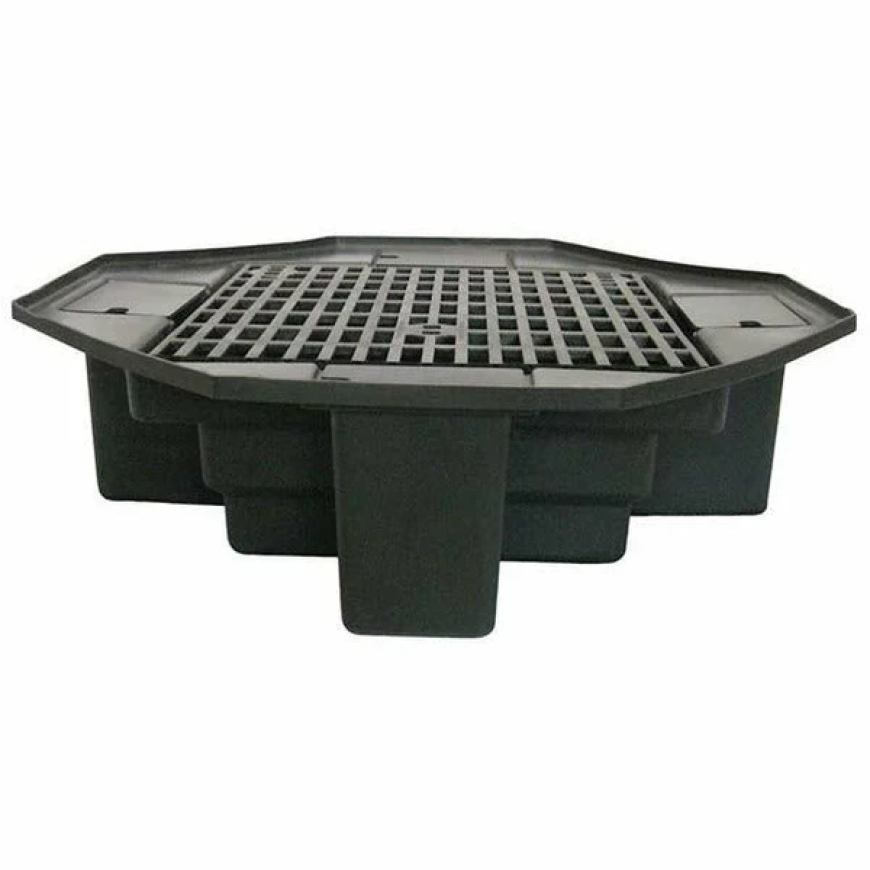
A Fountain Basin is a reservoir that stores and collects the water used by a fountain. A pump moves water from the basin through the fountain feature, after which the water flows back into the reservoir.
Depending on the design, the basin can be installed above ground or below the surface. Underground basins are especially useful when you want to hide the pump and tubing for a cleaner landscape appearance.
Tools and Materials You May Need
Gather your supplies before beginning the installation.
Common items include:
-
Fountain basin
-
Fountain pump
-
Flexible tubing
-
Measuring tape
-
Shovel
-
Level
-
Gravel or approved base material
-
Decorative stones or paving
-
Clean water
-
Outdoor-rated electrical equipment
The exact requirements depend on the basin and fountain system, so always read the manufacturer's installation instructions first.
Step 1: Choose the Right Location
Select a suitable location for your fountain.
Look for an area that is relatively level and provides enough space for the basin, fountain, and maintenance access. Consider the location of electrical outlets and make sure water will not regularly splash onto electrical connections.
Also consider wind direction. Strong wind can carry water outside the basin and increase water loss.
Step 2: Measure the Installation Area
Measure the available space before digging or positioning the basin.
Check the:
-
Length
-
Width
-
Depth
-
Surrounding clearance
-
Required fountain height
For underground installations, compare these measurements with the basin's dimensions. Leave sufficient space for installation and maintenance according to the manufacturer's instructions.
Step 3: Mark and Prepare the Ground
Mark the location where the basin will be installed.
Remove grass, plants, rocks, roots, and other obstacles from the area. If the basin will be underground, prepare an excavation that matches the required dimensions.
Do not dig deeper than necessary. The basin needs a stable and properly supported foundation.
Step 4: Create a Stable Base
Prepare a firm, level base at the bottom of the excavation.
Depending on the manufacturer's instructions, this may involve compacted gravel, sand, concrete, or another suitable base material.
Use a level to check the surface carefully. A stable foundation helps prevent the basin from shifting or settling after installation.
Step 5: Place the Basin
Carefully position the basin on the prepared base.
Check the basin from multiple directions with a level. It should sit evenly and securely.
If the basin is tilted, adjust the supporting base rather than trying to force the basin into position.
Step 6: Install the Pump
Place the pump in the basin according to its installation instructions.
Make sure the pump has adequate water around it during normal operation. Connect the appropriate tubing and make sure it is not sharply bent, crushed, or blocked.
Do not connect or handle electrical equipment with wet hands. Follow the manufacturer's electrical safety instructions carefully.
Step 7: Connect the Fountain
Attach the tubing to the fountain head, nozzle, spillway, or other water feature.
Check each connection carefully to make sure it is secure.
A loose connection can cause leaks, reduce water pressure, and affect the appearance of the fountain.
Step 8: Add Water
Fill the basin with clean water to the recommended operating level.
Do not rely on a generic fill line if your fountain or pump has specific water-level requirements. The pump should remain adequately submerged during operation.
Leave appropriate space for normal water movement and splashing.
Step 9: Test the Fountain
Turn on the pump and observe the fountain.
Check whether:
-
Water flows correctly
-
Water returns to the basin
-
The pump operates normally
-
Connections remain dry
-
Splashing stays within an acceptable area
-
The basin remains stable
Let the fountain run for a short period while checking the system.
Step 10: Adjust the Water Flow
If the fountain spray is too strong or water is landing outside the basin, adjust the fountain nozzle or pump settings if the system allows it.
The goal is to create a consistent water pattern while keeping most of the water inside the reservoir.
Small adjustments can make a significant difference in water loss and fountain performance.
Step 11: Finish the Surrounding Area
Once the fountain is working correctly, finish the landscaping around the basin.
Depending on your design, you can use:
-
Decorative gravel
-
Natural stones
-
Paving
-
Garden plants
-
Outdoor ornaments
-
Fountain covers or grates where appropriate
Make sure the surrounding material does not interfere with the pump, tubing, or maintenance access.
Step 12: Check Everything Again
Before considering the installation complete, inspect the entire system.
Look for leaks, unstable surfaces, loose connections, unusual pump noise, and excessive water loss.
It is better to identify a problem now than after the fountain has been surrounded by landscaping materials.
Common Fountain Basin Installation Mistakes
Avoid these common problems during installation:
Installing on an Uneven Base
An uneven basin can create poor water distribution and make the fountain look unbalanced.
Choosing the Wrong Basin Size
The basin should provide enough water capacity for the fountain and pump system.
Ignoring Splash Patterns
Water that repeatedly lands outside the basin can cause rapid water loss and wet surrounding surfaces.
Blocking Pump Access
Always leave a practical way to reach the pump for cleaning and maintenance.
Poor Electrical Setup
Outdoor electrical connections require appropriate protection and installation. Follow applicable local requirements and manufacturer instructions, and use a qualified electrician when needed.
Fountain Basin Maintenance After Installation
Installation is only the beginning. Regular maintenance helps keep the fountain working properly.
Remove leaves and debris from the basin regularly. Check the water level and refill it when necessary. Clean the pump and fountain nozzle according to the manufacturer's instructions.
Inspect the basin, tubing, and connections for cracks or leaks. During hot or windy weather, check the water level more frequently because evaporation and splashing may increase.
Final Thoughts
A successful fountain basin installation starts with good planning. Choose the right location, prepare a stable and level base, position the basin carefully, install the pump and tubing correctly, and test the fountain before completing the surrounding landscape.
Following the manufacturer's instructions is important because basin and pump requirements can vary. With proper installation and regular care, your outdoor fountain can provide a relaxing and attractive feature for years to come.