DIY vs. Professional: How to Customize a Leather Jacket Without Regret
This guide offers a comprehensive look at planning, executing, and maintaining customizations—helping you avoid pitfalls and ensure your jacket remains a timeless, well-crafted piece.
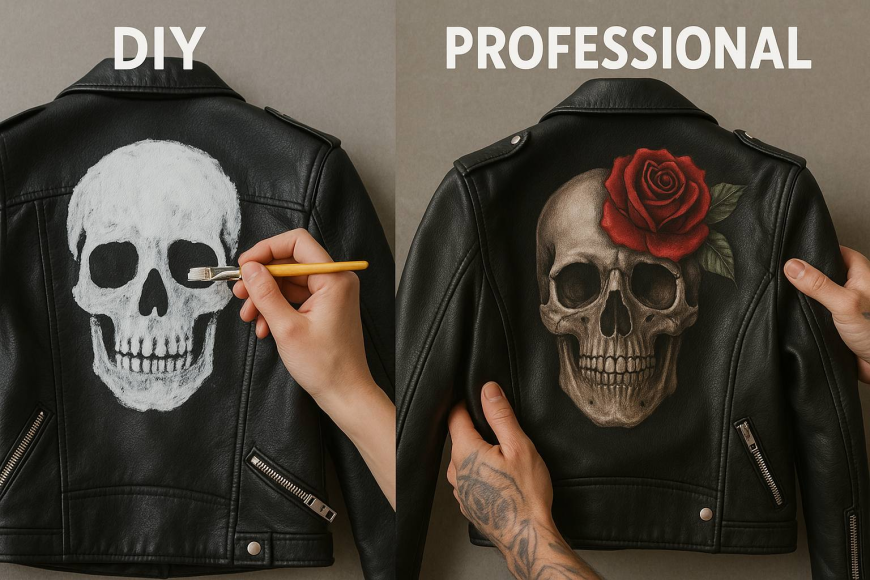
Leather jacket customization is a popular way to add personality, style, and originality to an already classic wardrobe staple. Whether you’re aiming to transform a vintage find or infuse a brand-new piece with your unique taste, the choice between taking on a project yourself (DIY) or entrusting it to a professional can dramatically affect the outcome. This guide offers a comprehensive look at planning, executing, and maintaining customizations—helping you avoid pitfalls and ensure your jacket remains a timeless, well-crafted piece.
Why Customize a Leather Jacket?
Leather jackets have endured as a fashion staple for decades, partly because of their durability, partly due to their ability to convey individuality. When you own a plain black or brown jacket, you might feel it lacks personality. Customization is the answer: by altering color, adding embellishments, changing fit, or incorporating original design elements, you transform a standard jacket into an expression of your style.
- Personal Expression: A customized jacket tells a story about your interests, memories, or artistic vision.
- Unique Wardrobe Piece: Off-the-rack jackets can be stylish, but many people wear similar styles. Customizing ensures no two jackets look exactly alike.
- Reviving Old Jackets: Maybe you inherited a worn-out piece or want to breathe new life into an old favorite. Customization can restore form and function.
- Value Addition: A well-done alteration or artistic addition can increase the jacket’s aesthetic appeal and resale or collector’s value.
However, the path to a regret-free outcome demands thoughtful planning. Will you take the DIY route, betting on your creativity and willingness to learn, or choose to pay professional artisans for flawless execution? Each option has its advantages and caveats, which we discuss next.
DIY vs. Professional: The Big Debate
When deciding between DIY and professional services, consider factors like budget, skill level, desired timeline, and the complexity of customization.
Advantages of DIY Customization
- Cost Savings
- Supplies like leather paints, adhesives, or studs might cost less than labor fees.
- Small modifications—such as adding patches or simple distressing—are affordable if you already own basic sewing or crafting tools.
- Creative Control
- You have full authority over design, placement, and color choices.
- The satisfaction of creating something unique is priceless; no third party can impose limitations on your vision.
- Learning Experience
- Developing skills in leather care, painting, or sewing can be rewarding.
- Even if mistakes happen, they become lessons that improve your future projects.
Advantages of Professional Customization
- Expertise and Precision
- Professionals spend years refining techniques like tailored hemming, complex embroidery, and structural alterations.
- They understand leather types (cowhide, lambskin, goat leather) and know exactly how various treatments will affect texture and durability.
- High-Quality Results
- Professionals use industrial-grade equipment—heavy-duty sewing machines, punch presses for rivets, specialized dyeing vats—that achieve finishes often impossible at home.
- Seam consistency, stress-point reinforcement, and color fastness are more reliable.
- Time Efficiency
- No need to dedicate weeks to experimenting or practice sessions.
- Skilled artisans can usually complete projects faster, especially large-scale custom jackets or multiple modification requests.
Disadvantages of Each Approach
- DIY Drawbacks
- Mistakes can be costly: irreversible paint runs, uneven seam lines, cracked leather from improper prep.
- Learning curves are steep if you’ve never worked with leather.
- Limited tools: Home sewing machines may struggle with thick hides; household adhesives might weaken over time.
- Professional Drawbacks
- Higher upfront costs: labor rates, specialized materials, designer fees.
- Potential communication gaps: if you can’t convey your vision clearly, the final product might not match expectations.
- Less personal involvement: you’re handing over your cherished jacket to someone else’s interpretation.
Now that you understand the core pros and cons, let’s dive into planning your customization journey.
Planning Your Leather Jacket Customization
A successful customization starts with a clear plan. Whether you go DIY or hire a professional, consider these crucial preparatory steps.
Defining Your Vision
- Inspiration Gathering: Browse magazines, social media platforms like Instagram or Pinterest, and leather craftsmanship forums to find styles you admire.
- Mood Boards and Sketches: Compile images of color palettes, patch placements, or hardware ideas. Sketch out your jacket’s front, back, and sleeves—this visual guide will keep you aligned with your goal.
- Theme Selection: Do you want a rocker-inspired look with studs and distressing? Perhaps a vintage vibe with faded colors and classic patches? Clearly articulate your theme in writing: “I want a slim-fit black leather jacket with silver rivets on the shoulders and a faded hand-painted eagle on the back.”
- Feasibility Check: Be realistic. A complex, multi-layered gothic design might be difficult for a first-time DIYer. Conversely, simple embroidery might not seem worthwhile if you have a budget that supports professional fees. Balance ambition with skill level or allocated funds.
Budget Considerations
- DIY Costs
- Materials: Leather paint sets range from $15–$50. Stud kits cost $10–$30. Quality leather needles and thread add $10–$20. Overall, a small DIY project can stay under $100.
- Tools: If you don’t own a heavy-duty sewing machine, consider borrowing or renting. Hand-stitching tools—like awls, thimbles, and cutting mats—may be one-time investments.
- Time Value: Factor in your personal time as part of the cost. If it takes 20 hours to perfect a hand-painted design, consider whether that aligns with your schedule.
- Professional Costs
- Labor: Simple repairs or minor alterations (hem shortening, zipper replacement) might be $30–$80. Major tailoring (taking in seams, resizing multiple panels) can run $150–$300 or more.
- Design Fees: Custom paint work or embroidery might involve an artist’s hourly rate—commonly $50–$100 per hour. Complex, large-scale projects can reach $500+ in labor alone.
- Additional Materials: Some professionals charge extra for high-grade paint, specialty hardware, or premium leather patches. Always request a detailed estimate that breaks out all costs clearly.
Choosing a Base Jacket
Your canvas matters. A high-quality leather jacket will respond better to custom treatments than a cheap, synthetic imitation.
- Leather Grade
- Full-Grain Leather: Often found in premium jackets, this durable hide resists tearing and can be easily conditioned. It’s ideal for long-lasting custom work.
- Top-Grain Leather: Slightly thinner than full-grain, it’s still genuine leather. Dye and paint adhere well, though it may be less forgiving with repeated stress.
- Split Leather / Bonded Leather: Usually cheaper and less durable. Paint may flake, and the material can wear out faster. Avoid for serious customization.
- New vs. Vintage
- New Jackets: Crisp stitching, uniform color, and consistent thickness. Ideal if you want a clean slate for painting or distressing.
- Vintage Jackets: Patina-rich, they have character and can be perfect for retro-inspired projects. Inspect for weak spots, dried-out linings, or brittle panels.
- Fit and Silhouette
- If you plan to have the jacket altered, choose one slightly larger than your normal size. This allows enough fabric/ leather for taking in seams, resizing arms, or adding panels.
- If you intend minor DIY edits (paint, patches), pick a jacket that already fits you well. There’s no need to gamble on fit adjustments.
When you’re ready to purchase, consider investing in well-reviewed options. If you want to browse prime, ready-to-customize choices, check out Best leather jackets that offer sturdy builds and flattering cuts.
Essential Tools and Materials for DIY Projects
For hands-on projects, having the right supplies makes all the difference. Below is a list of must-have materials and tools to achieve professional-looking results at home.
Leather Paints and Dyes
- Acrylic Leather Paints: Flexible, water-based, and available in numerous colors. Brand examples: Angelus, Fiebing’s Acrylic.
- Leather Dyes: Penetrate deeper into the hide for uniform coloring. Use Fiebing’s Leather Dye for classic colorways.
- Paint Brushes and Sponges: Soft-bristle brushes for detailed work; sponge daubers for broader coverage.
- Mixing Palette: For blending custom shades, use a non-porous surface (ceramic or glass).
- Leather De-glazer: Essential for removing existing finishes so paint/dye adheres evenly.
Studs, Rivets, and Embellishments
- Punk-Style Studs: Cone, pyramid, or round studs—often come in packs with setting tools.
- Rivet Kits: Backed by setting tools (handheld pliers or small mallets) to secure rivets through thick hide.
- Zippers and Buckles: Replacement metal zippers can refresh old jackets. Heavy-duty buckles for belt straps on waist sections.
- Spikes and Chains: For rocker or biker aesthetics; ensure you measure placement accurately to avoid overcrowding.
Sewing Supplies and Patches
- Leather Needles: Tapered or chisel-point needles that pierce leather without tearing.
- Waxed Polyester Thread: Strong and abrasion-resistant; available in black, brown, or color-matched tones.
- Thimble or Finger Guard: Protects fingers when hand-stitching through thick hide.
- Iron-On or Sew-On Patches: Embroidered designs—band logos, flags, or personalized art. Check adhesive quality if heat-sealing onto leather.
- Seam Ripper: For undoing mistakes or removing old stitches before reworking sections.
Leather Conditioners and Sealants
- Leather Conditioner: Prevents drying and cracking after painting or distressing. Neatsfoot oil or mink oil are classic choices.
- Leather Finish/Sealer: Protects paint from scuffing and fading. Use a matte or gloss finish according to desired sheen.
- Leather Cleaner: Mild, pH-balanced formulas to prep the surface. Avoid harsh detergents that strip natural oils.
- Microfiber Cloths: For applying conditioners and wiping off excess dye or paint.
Equipped with these materials, you’re ready to execute a range of DIY techniques. In the next section, we explore step-by-step methods to bring your vision to life.
DIY Customization Techniques
Below are popular, beginner-friendly techniques that allow you to dramatically alter a jacket’s appearance. Each method includes a brief overview, step-by-step guidance, and tips to avoid common mistakes.
Painting and Stenciling
Painting offers infinite possibilities: bold logos, abstract patterns, or realistic portraits. Stencils help maintain clean lines.
Overview
- Customizing with paint is best done on dyed or neutral-colored leather.
- You need to strip any factory finish with a leather de-glazer, apply base coats, then layer your design.
Steps
- De-Glaze and Clean
- Place newspaper or old cloth inside the jacket to protect the lining.
- Use a leather de-glazer (applied with a cloth) to remove existing finish where you intend to paint.
- Wipe the area with a damp cloth and let it dry fully (24 hours recommended).
- Sketch and Mask
- Lightly sketch your design with a soft pencil or tailor’s chalk.
- Position stencils (paper, vinyl, or adhesive) and secure edges with low-tack tape.
- Apply Base Coat
- With a sponge or wide brush, apply a thin, even layer of base paint. Allow it to dry for at least 30–60 minutes.
- For deeper colors, add a second layer once the first has fully dried.
- Detail Work
- Use fine brushes for intricate lines or shading. Keep a steady hand by resting your wrist on the jacket (avoiding the wet paint).
- Work from light colors to dark to prevent smudging.
- Seal the Paint
- Once fully dry (24 hours), apply a leather sealant. Two light coats—allowing 10–15 minutes to dry between—ensure durability.
- Condition Leather
- After 48 hours, lightly condition areas outside the painted design to keep rest of jacket supple.
Tips
- Always test paint on a scrap piece or inconspicuous seam first.
- Thin layers prevent cracking when the leather flexes.
- Patience is critical—rushing leads to fingerprints in paint or bubbling under the sealant.
Adding Patches, Embroidery, and Appliqués
Whether you choose pre-made patches or custom embroidery, adding textile elements brings texture and color.
Overview
- Iron-on patches may not adhere well to genuine leather, so sewing is recommended.
- Embroidery can be done by hand or via a sewing machine that accommodates leather.
Steps
- Positioning
- Place the patch or embroider design on the desired area. Use pins or fabric chalk to mark boundaries.
- Double-check symmetry by hanging the jacket and inspecting in a mirror.
- Preparation
- If using a sewing machine, use a leather needle and adjust tension to handle thick layers.
- For hand-stitching, thread the waxed polyester thread through a leather needle, tie a sturdy knot.
- Stitching Techniques
- Machine Embroidery: Reduce foot pressure, slow stitch speed. Use a stabilizer (tear-away or cut-away) behind the patch area.
- Hand Embroidery: Use a running stitch or backstitch for outlines. For larger patches, mattress or blanket stitches secure edges.
- Finishing
- Trim excess thread and remove stabilizer, if used.
- Gently press the patch edges with a warm (not hot) iron over a cloth to flatten.
- Seal the Edges (Optional)
- Apply a dab of clear leather sealant along patched edges to prevent peeling.
Tips
- If you’re not confident with freehand embroidery, consider having a local embroidery shop digitize a file and stitch the patch for you.
- For delicate or intricate patches, hand-stitching provides more control than a machine.
- Keep stitches even; inconsistent stitching can warp or bunch the patch.
Installing Studs, Rivets, and Hardware
Metal accents like studs, rivets, or zippers give a jacket a bold, edgy look. When placed strategically—on shoulders, collar, or lapels—they add dimension without overwhelming.
Overview
- Stud kits typically come with male and female posts that snap together with a setting tool.
- Rivets require a punched hole and a mallet or rivet setter to secure.
- Hardware upgrades (e.g., swapping plastic zippers for metal) involve removing old elements and stitching new ones.
Steps
- Select Hardware
- Choose finishes—silver, antique brass, gunmetal—that match other accessories (belts, boots).
- Count the number needed: measure distances between planned placements.
- Mark Locations
- Use tailor’s chalk or a washable fabric pen to mark precise spots. Measure equal distances to ensure symmetry.
- Place cardboard inside the jacket to prevent indentations on the reverse side.
- Punch Holes (If Needed)
- For rivets: use a leather punch bit slightly smaller than the rivet post.
- For studs with prongs: some studs don’t require a hole; prongs pierce the leather directly.
- Attach Hardware
- Studs: Insert prongs through leather, place the backing, and press firmly with the setting tool. For hand sets, use a hammer on a small anvil or block.
- Rivets: Push the rivet post through the hole, place the cap on top, and hammer or press until flush.
- Check Stability
- Tug gently on each piece to confirm secure fastening. A loose stud can tear or slide out over time.
- Use a drop of clear fabric glue (optional) around the base for extra hold, but avoid visible residue.
Tips
- Practice on scrap leather to perfect alignment and pressure.
- Too much force can tear the leather or flatten studs unevenly.
- For large hardware (like oversized buckles), reinforce the area from inside with a leather patch to distribute stress.
Distressing and Aging Techniques
Distressed or vintage-inspired finishes give new jackets an authentic, broken-in character.
Overview
- Achieved by scuffing, sanding, or lightly abrading areas that naturally wear—collars, cuffs, elbows.
- Chemical aging (using rubbing alcohol or diluted bleach) can lighten and soften specific spots.
Steps
- Identify Wear Points
- Visualize where a jacket would naturally crease: shoulder tops, sleeve creases, backside of elbows.
- Lightly mark areas to distress with chalk, using reference photos of genuinely aged jackets.
- Mechanical Distressing
- Use fine-grit sandpaper (400–600 grit) to gently buff classes: apply light circles until the desired fade appears.
- Steel wool (000 grade) can create subtle scratches. Rub gently to avoid holes.
- Chemical Aging (Optional)
- Dampen a cloth with isopropyl alcohol or a weak bleach solution (1 part bleach to 10 parts water).
- Lightly dab targeted areas, then immediately wipe off and let dry. Inspect results before repeating.
- Refinishing Worn Edges
- If you remove too much pigment, apply a matching leather dye with a foam applicator to blend.
- Condition afterward to prevent overly dry, brittle patches.
Tips
- Start with minimal abrasion or chemical application. You can always increase distressing, but reversing over-distressing can be challenging.
- Always wear gloves when working with chemicals and ventilate your workspace.
- After aging, thoroughly condition to restore oils lost during abrasion or chemical treatment.
Resizing and Minor Tailoring
Simple take-in or let-out procedures—like shortening sleeves, adjusting the waist, or modifying the collar—are feasible for intermediate DIYers with sewing experience. However, one wrong stitch can distort the jacket’s grain.
Overview
- Requires precise measurement, seam ripping, re-seaming, and pressing.
- Leather grain shows needle holes permanently, so accuracy is paramount.
Steps
- Measure Twice, Cut Once
- Wear the jacket with layers similar to how you’ll style it. Pin seam allowances using clothespins or clips—never use pins that leave holes.
- Label altered sections with masking tape and a fine-tip pen.
- Seam Rip and Test Fit
- Carefully remove stitches along the inside seam using a seam ripper. Avoid tearing leather fibers.
- Test the fit by pinching seams and using clips to visualize final shape.
- Sewing Seams
- Use a heavy-duty leather needle and strong thread. Adjust your sewing machine’s stitch length to a longer setting (3.5–4.0 mm) for even distribution.
- Backstitch at the beginning and end of each seam to secure.
- Press seams gently with a handheld leather press or by placing a cloth between iron and leather on a low heat—avoid direct contact.
- Inspect and Trim
- Ensure seams lie flat without puckering. Trim excess seam allowance if needed, but keep at least ¼" of leather to prevent puckering over time.
- Add a thin leather seam reinforcement tape behind stress points (underarm, sides) to strengthen newly sewn areas.
Tips
- If your machine struggles, consider hand-stitching visible seams for a more authentic look. Use a saddle stitch for durability.
- Maintain consistent seam allowance; uneven allowances result in asymmetrical fit.
- Always test on scrap leather to dial in machine tension before working on the real jacket.
When to Seek Professional Help
Some customizations transcend what most DIY enthusiasts can accomplish. In these cases, turning to a skilled leather artisan or tailor ensures top-notch results.
Complex Tailoring and Resizing
If you need dramatic alterations—like resizing a vintage jacket by several sizes, reconstructing entire panels, or moving zippers—professionals have specialized machines and patterns that preserve the jacket’s silhouette without compromising structure.
- Structural Alterations
- Taking in or letting out multiple seams across the body, shoulders, and arms.
- Completely reshaping lapels, collars, or jacket bottoms for a customized fit.
- Re-lining or Lining Repairs
- Patching or replacing lining fabric (satin, polyester, or custom prints) requires sewing equipment that can handle slippery materials.
- Professionals match thread color and stitch style to conceal work seamlessly.
High-End Custom Leatherwork
Luxury customizations—like hand-tooled designs, laser etching, or inlaid leather art—demand expertise and specialized studio equipment.
- Leather Tooling: Hand-tooled patterns (floral, geometric, or symbolic) carved into the leather surface create depth and detail.
- Laser Etching: Precision-cut images or lettering—used for monograms, logos, or detailed graphics.
- Exotic Leather Inlays: Incorporating snakeskin, ostrich, or crocodile patches into jackets requires careful matching of thickness, grain, and tanning processes.
Intricate Embroidery and Detailing
While simple hand embroidery can be DIY, large-scale, multi-color designs or beadwork require professional digitizing, stabilizing, and stitching. Machine embroidery specialists can handle thick leather layers without distorting the material.
- Digitized Designs
- Convert a digital image into an embroidery file compatible with industrial machines.
- Fine-tune stitch density and underlay settings to avoid pulling or dimpling.
- Beadwork and Sequins
- Attaching thousands of beads with uniform tension is best done by hand in a professional workshop.
- Secure backing or stiffener often needed to prevent sagging under bead weight.
Expert Repairs and Restoration
- Repairing Tears and Rips: Matching dye, grain, and seam style on a torn section is tricky. A professional can source matching leather patches and seamlessly integrate them.
- Zipper Replacement: High-quality metal zippers (YKK or RiRi) require precise removal and resewing.
- Color Restoration: Complete re-dyeing of faded jackets—especially vintage pieces—needs expert color matching to maintain authenticity.
If your project falls into any of the above categories, explore bespoke services through custom made jackets that pair your vision with experienced leather artisans.
Finding the Right Professional
Selecting the right expert is as crucial as deciding to go professional in the first place. Here’s how to ensure you find a trustworthy, talented craftsman.
Researching Local and Online Services
- Local Leather Shops
- Search for leather boutiques, tailor shops, or cobblers in your city. Local artisans often display sample works in their shops or websites.
- Check if they specialize exclusively in leather—general tailors may lack experience handling thick hides.
- Online Custom Services
- Many reputable ateliers offer mail-in customization. You ship your jacket, and they return it upgraded.
- Ensure they have clear shipping protocols (insurance, tracking) to protect your garment.
- Social Media and Marketplace Platforms
- Instagram accounts dedicated to leatherwork often post before-and-after photos, giving insight into their style and execution.
- Marketplaces like Etsy feature small leather studios, but read individual shop policies on returns, revisions, and timelines.
Reading Reviews and Portfolios
- Client Testimonials: Look for feedback about communication, adherence to timelines, and final appearance. Sites like Yelp or Google Reviews can provide unfiltered experiences.
- Portfolio Photos: A collection of high-resolution images showcasing various projects—painted backs, studded shoulders, tailored fits—indicates versatility.
- Before-and-After Documentation: Professionals who document the process build trust. You should see initial jacket condition, work-in-progress shots, and final product images side by side.
Requesting Quotes and Timelines
- Detailed Estimates: Ask potential providers for a breakdown: labor hours, materials, shipping (if applicable), and any additional fees.
- Turnaround Time: Custom projects often require multiple weeks. If you need faster service, inquire about rush fees.
- Revision Policies: Clarify how many rounds of revisions are included. If the initial result doesn’t match your vision, will they adjust without extra cost?
- Guarantees and Warranties: Some artisans offer a limited warranty on stitches or hardware—for example, free repairs if rivets detach within six months.
Custom Made Jackets: A Closer Look
For those interested in creating a brand-new garment tailored from scratch, exploring custom made jackets offers the most control over every detail: leather type, lining fabric, hardware finishes, and overall silhouette. Many custom services allow you to:
- Select from premium hides—lambskin, goatskin, or buffalo leather.
- Choose lining materials ranging from quilted satin to breathable cotton-net blends.
- Specify embellishment types—stud patterns, embroidered patches, or embossed logos.
- Match hardware colors (silver, brass, matte black) to complement your aesthetic.
Working with a custom studio typically involves an initial consultation, pattern drafting (by measurement or fit sample), and multiple fittings (if local). The end result is a one-of-a-kind jacket that reflects your identity down to the smallest detail.
Cost Comparison: DIY vs. Professional
Understanding the financial aspect helps you select the ideal path. Below is a detailed cost breakdown.
Typical DIY Material Costs
- Leather Paint and Sealant: $20–$60 per set (depending on brand and number of colors).
- De-Glazer and Cleaner: $10–$20.
- Stud and Rivet Kits: $15–$35 (includes basic setting tools).
- Sewing Supplies: ~$20 for needles, thread, and thimbles.
- Patches and Appliqués: $5–$25 each (depending on size and complexity).
- Leather Conditioner: $10–$30 per bottle.
- Tools Rental (Optional): Sewing machine rental $30–$50 per day or local maker-space fees.
Total DIY Costs (for a moderate project): $80–$200. This excludes the cost of the base jacket, which varies widely (from $100 for entry-level jackets to $500+ for high-end options).
Professional Service Fees
- Minor Alterations: $30–$80 (hem shortening, simple seam adjustments).
- Major Tailoring: $150–$300 (re-structuring body panels, resizing multiple sections).
- Custom Painting or Large-Scale Embroidery: $200–$500+ (depending on complexity and hours required).
- Hardware Installation (Bulk Studding): $100–$250 (includes studs and labor).
- Full Restoration or Re-Dyeing: $200–$400.
Total Professional Costs (for a comprehensive project): $300–$1,000+. High-end or luxury projects—especially those involving exotic leathers—can exceed $1,500.
Long-Term Value and Resale Considerations
- DIY Projects
- If executed well, a DIY customization can still add resale value—especially unique paint designs or carefully applied patches.
- However, visible errors (uneven stitches, paint cracks) can reduce lifespan and resale price.
- Professional Projects
- Expert craftsmanship often enhances the jacket’s value. Collectors and enthusiasts are willing to pay premiums for recognized artisan work.
- Professional alterations maintain structural integrity, meaning the jacket remains wearable for longer, thereby offering better long-term value.
Common Pitfalls and How to Avoid Regret
Even seasoned DIYers and professionals occasionally make mistakes. Below are common issues and strategies to dodge disappointment.
Overthinking the Design
- Pitfall: Spending weeks sketching intricate designs that, in execution, become overwhelming or visually cluttered.
- Avoidance: Start with simplified versions—test small areas before committing to extensive painting or embellishment. Create mock-ups on paper or inexpensive fabric. Focus on a single focal point (e.g., back panel art) rather than customizing every surface at once.
Using Incompatible Materials
- Pitfall: Applying standard fabric patches to leather without reinforcing, leading to peeling or uneven edges.
- Avoidance: Verify that adhesives or threads match leather’s thickness and flexibility. Choose leather-specific paints instead of generic acrylics. Always read labels: some “leather” cleaners are meant for faux leather only.
Skipping Proper Preparation
- Pitfall: Neglecting to de-glaze before painting, resulting in paint that flakes within weeks.
- Avoidance: Treat every surface thoroughly: clean, de-glaze, and test a small swatch before full application. Let solvents evaporate completely.
Neglecting Maintenance
- Pitfall: Assuming once painted or sealed, the jacket requires no further care. Over time, dried leather loses oils, and paint can crack if neglected.
- Avoidance: Establish a monthly care routine: gently wipe dust, condition uncovered areas, and inspect hardware for loosening. For painted sections, avoid harsh cleaners—spot-treat using leather-specific solutions.
Step-by-Step Guide: A Sample DIY Project
Below is a detailed walkthrough of a hypothetical but realistic DIY customization project: adding hand-painted graphics and studding to a classic black leather jacket.
Gathering Materials and Workspace Setup
Materials List
- Black full-grain leather motorcycle jacket (size 1–2 sizes larger than your standard fit to allow for minor take-ins).
- Leather De-Glazer (Fiebing’s Preparer and Deglazer).
- Acrylic Leather Paints (Angelus Basic Color Set).
- Fine and Medium Paint Brushes (flat and round).
- Silver Pyramid Stud Kit (100 studs with handheld setter).
- Leather Conditioner (Lexol or Leather Honey).
- Leather Sealant (Angelus Acri-Flex Clear).
- Leather Needle and Waxed Thread (black).
- Small Hammer or Mallet (rubber-faced to avoid marring).
- 500-Grit Sandpaper (for minor aging).
- Masking Tape and Chalk.
- Microfiber Cloths.
- Newspaper or Drop Cloth.
- Work Table with Good Lighting.
Workspace Setup
- Flat Surface: Clear a table or workbench. Cover with newspaper or an old sheet to catch drips or debris.
- Ventilation: Ensure your workspace has an open window or a fan, especially when using de-glazer and sealant.
- Tools at Hand: Organize brushes, paints, and tools in a small caddy so you don’t search mid-project.
- Protective Gear: Wear disposable gloves to avoid dye stains. An apron or old clothing is advised.
Cleaning and Prepping the Jacket
- Remove Dust and Debris
- Use a microfiber cloth to gently wipe the entire jacket. Pay special attention to seams and pockets where dust accumulates.
- Apply De-Glazer
- Place the jacket on the flattened work surface.
- Dip a cloth in the de-glazer and rub the chosen painting areas in small, circular motions. This removes surface finishes and opens pores for paint.
- Let it dry for 24 hours in a well-ventilated area. Avoid direct sunlight that could warp leather.
- Light Sanding (Optional for Aging)
- If you want a slight distressed background, gently rub 500-grit sandpaper across shoulder tops and sleeve folds. This roughens the surface and helps paint grip.
- Wipe off dust with a clean cloth.
Applying Paint or Dye
- Sketch Your Design
- Lightly draw your motif (eagle, custom logo, or abstract pattern) with tailor’s chalk on the back panel. Ensure it’s centered and proportionate to the jacket’s dimensions.
- Mask Surrounding Areas
- Use masking tape to protect zippers, collar edges, and pockets. Cover these with tape so paint does not stick.
- Base Coat
- Stir your black or background color of choice. Test on a scrap piece if possible.
- Using a sponge, apply a thin, even base layer. Keep brush strokes consistent to prevent streaks.
- Let dry for 45–60 minutes.
- Layering and Shading
- Add mid-tones and highlights, working from light to dark. For example, paint the eagle’s feathers first in a light gray, then layer darker grays for depth.
- Use small round brushes for detailed feather lines.
- Edge Cleanup
- After paint has set but is still slightly tacky (around 6–8 hours later), use a Q-tip dipped in isopropyl alcohol to clean any stray lines along edges.
- Seal the Paint
- Wait 24 hours after final paint layer.
- Apply thin coats of sealant: dip a foam brush, brush in one direction, let dry for 10 minutes, then apply the second coat. Avoid pooling.
- Allow another 24 hours of curing before handling heavily.
Adding Embellishments
- Planning Stud Placement
- Using tailor’s chalk, mark stud grid patterns on each shoulder and across the top of each sleeve. Aim for even spacing (e.g., 1½" apart).
- Creating Starter Holes
- For pronged studs, lightly poke with a leather punch or awl to guide prongs through.
- Place a piece of cardboard inside the jacket behind each marking to prevent backing up the project.
- Setting Studs
- Insert stud prongs through the leather from the exterior. On the inside, align the stud backing.
- Press lightly with your fingers to hold in place, then use the handheld setter or rubber-faced hammer to flatten and secure.
- Check that each stud lies flat and is not loose.
- Final Inspection
- Look over each row of studs, ensuring consistency in angle and placement. Adjust as needed.
- Remove chalk lines gently by wiping with a slightly damp cloth.
Sealing and Finishing
- Final Conditioning
- Once paint and studding are complete (48 hours after sealing), apply a light coat of leather conditioner to all unpainted areas.
- Use a microfiber cloth to rub in the conditioner, then buff lightly.
- Edge Touch-Ups
- If distressing is desired, repeat the light sanding process along edges.
- Seal any newly revealed areas with a thin dab of sealant to prevent fraying.
- Polish Hardware
- Wipe studs with a dry cloth to remove any dust. For extra shine, use a metal polishing cloth, taking care not to touch painted sections.
Final Inspection and Care Tips
- Check for Paint Flakes
- Bend the jacket gently—simulate how it moves when worn. Look for any early signs of cracking. If found, apply another thin coat of sealant on those spots.
- Verify Fit
- Put on the jacket and move your arms through full range. Ensure stud placement does not catch on fabric or pinch skin.
- Document the Project
- Take high-resolution photos for your records. This helps if you ever need touch-ups or want to replicate the design.
- First Wear
- Wear the jacket in dry conditions initially. Avoid rain or extreme humidity for the first month to allow paints and sealants to internalize.
- Short-Term Storage
- Hang on a broad-shouldered, padded hanger in a cool, well-ventilated closet. Cover with a breathable garment bag—avoid plastic covers.
- Maintenance Routine
- Every two months, apply a thin coat of conditioner (avoiding painted sections).
- If paint scuffs appear, spot treat with matching paint and a dab of sealant.
Maintenance and Long-Term Care
A customized jacket requires ongoing attention to keep it looking sharp. Here are actionable routines and tips.
Regular Cleaning and Conditioning
- Monthly Wipe Down
- Use a slightly damp microfiber cloth to remove surface dust. Pay attention to seams, collars, and edges where grime accumulates.
- Condition Every 2–3 Months
- Apply a small amount of leather conditioner to a soft cloth. Rub gently in circular motions across the jacket—exempt painted or embellished areas.
- Let sit for 15 minutes, then buff with a clean cloth. Conditioning prevents drying and cracking.
- Spot Cleaning
- For spills (water, oils, or light stains), immediately blot with a dry cloth—do not rub. For stubborn stains, use a leather-specific stain remover, testing a hidden area first.
Storing Your Customized Jacket
- Proper Hanger
- Always use a wide, padded hanger to avoid stretching the shoulders.
- Climate Control
- Store in environments with 40–60% humidity and temperatures from 60–70°F (15–21°C). Avoid attics or damp basements.
- Dust Cover
- Use a breathable cotton garment bag to protect from dust. Avoid plastic, which can trap moisture and cause mildew.
Touch-Up Techniques
- Paint Chips and Scuffs
- Keep small leftover paint vials. Touch up minor chips by gently filling missing areas, then reseal with a teeny amount of clear sealant.
- Loose Studs or Rivets
- Re-secure studs by pressing firmly with a setter. Add a drop of clear glue under the backing if studs seem to wobble.
- Thread Frays
- If a stitch loosens, tie a small knot at the end of the thread to prevent unraveling. For larger issues, remove the compromised section and carefully re-stitch using a leather needle.
By integrating these routines, your jacket will maintain its customized flair for years to come.
Frequently Asked Questions (FAQ)
Can I Undo a DIY Customization?
- Partial Reversal: Removing paint is challenging once it penetrates the top layer of leather. Using a leather de-glazer can strip surface paint if applied quickly, but deeper layers may leave faint outlines. Studs or rivets can be popped out gently with pliers; holes will remain. It’s best to plan carefully rather than rely on reversibility.
- Professional Reversal: Leather restoration specialists can sometimes match dye to fill in stud or patch holes, but colors may not align perfectly, especially if the leather has aged. True reversals are rare; consider irreversible aspects before starting.
How Do I Know if My Jacket Is Genuine Leather?
- Smell Test: Genuine leather has a distinct, rich aroma, unlike synthetic or bonded leather.
- Touch and Flex: Real leather feels supple and displays slight grain variations. Synthetic hides often feel plasticky and uniform.
- Edge Inspection: Genuine leather edges are fibrous, while faux leather edges are smooth and consistent.
- Water Drop Test: Sprinkle a tiny drop of water on an inconspicuous spot. Genuine leather absorbs moisture slowly, leaving a dark spot that fades; synthetics repel water. Always test discreetly.
Are Professional Customizations Worth the Cost?
- Durability and Precision: If you value longevity and a flawless finish, professional services justify higher fees. They guarantee tight seam lines, even paint coverage, and reinforced stress points.
- Time and Convenience: For busy individuals, outsourcing preserves weekends and avoids steep learning curves. You get expert advice, accurate timelines, and post-project support.
- Resale and Collectibility: Professionally customized jackets, especially by recognized artisans or brands, can command higher resale prices among collectors. Well-documented provenance (before-and-after photos, invoices) enhances authenticity and value.
Consider your priorities—cost, time, and end-result—before deciding. Many find a hybrid approach effective: handle simpler embellishments at home, then send the jacket for complex tailoring or large-scale embroidery.
Conclusion
Customizing a leather jacket offers a pathway to style that’s as personal as your fingerprint. Whether you decide to tackle modifications yourself or put your trust in a seasoned professional, the key is thoughtful preparation: clearly define your vision, understand budget limits, and choose the right materials or service provider.
- DIY Approach: Ideal for small-scale adjustments—adding patches, studying basic painting methods, or installing studs. It’s cost-effective, educational, and gives you hands-on creative control. But recognize your skill level and leave high-stakes alterations to experts when needed.
- Professional Approach: Perfect for intricate designs, major structural changes, or premium embellishments. Though more expensive, professional results are virtually guaranteed to look polished, fit perfectly, and last years.
Avoid common pitfalls by testing materials, using proper tools, and factoring in maintenance routines. If you decide to purchase a jacket specifically for customization, explore top-quality options and ensure the base is suitable for transformation. For instance, those seeking a selection tailored to men’s styles might want to browse best leather jackets for men that offer durable hides and flattering silhouettes.
Finally, if you’re inspired to skip the DIY route entirely, consider designing an entirely new garment by investigating custom made jackets, where experts guide you through every specification—from leather type to hardware finish.
With proper planning and execution, your customized leather jacket will be more than just clothing; it becomes a signature statement that you can wear with pride—without any regret.