Septic System Installation: A Step-by-Step Guide
If you’re a homeowner looking to install a septic system, you’re in the right place.
 tusar
tusar
Understanding how a septic system works and knowing the steps for installation can save you time, money, and frustration. Septic systems are crucial for managing wastewater when municipal sewage isn’t available, and a proper installation ensures your home stays safe and clean. In this guide, we’ll walk you through the process step by step, keeping it simple and easy to understand.
Assess Your Property and Needs
Before any digging or planning, take a good look at your property. The size of your lot, soil type, and local regulations all affect where your septic system installation can go. You need enough space for the tank and the drain field, and the soil must allow wastewater to filter properly. Check for slopes, rocks, or underground obstacles. Thinking about these factors early prevents costly mistakes later. Remember, a well-chosen location is the foundation of a healthy septic system.
Obtain Permits and Approvals
Installing a septic system isn’t something you can do without permission. Local health departments or municipal offices usually require permits. They’ll check your plans to ensure the system meets regulations and won’t harm the environment. This step may feel tedious, but it protects you from fines and ensures your system is safe and compliant. Always submit accurate site plans and soil test results to avoid delays.
Choose the Right Type of Septic System
Not all septic systems are the same. Depending on your property and household size, you might use a conventional system, a chamber system, or an advanced treatment system. Conventional systems use gravel and a perforated pipe for filtration, while chamber systems use connected plastic chambers. Advanced systems may be necessary for challenging soil or high water tables. Selecting the right system is crucial for long-term performance and minimal maintenance.
Site Preparation
Once you have the system type and permits, it’s time to prepare the site. This involves clearing the area, leveling the ground, and marking where the tank and drain field will go. Heavy machinery is usually required for excavation. Ensure all utilities like water, gas, and electricity are marked before digging. A well-prepared site makes installation faster and safer, and it helps prevent future issues like water pooling or pipe blockages.
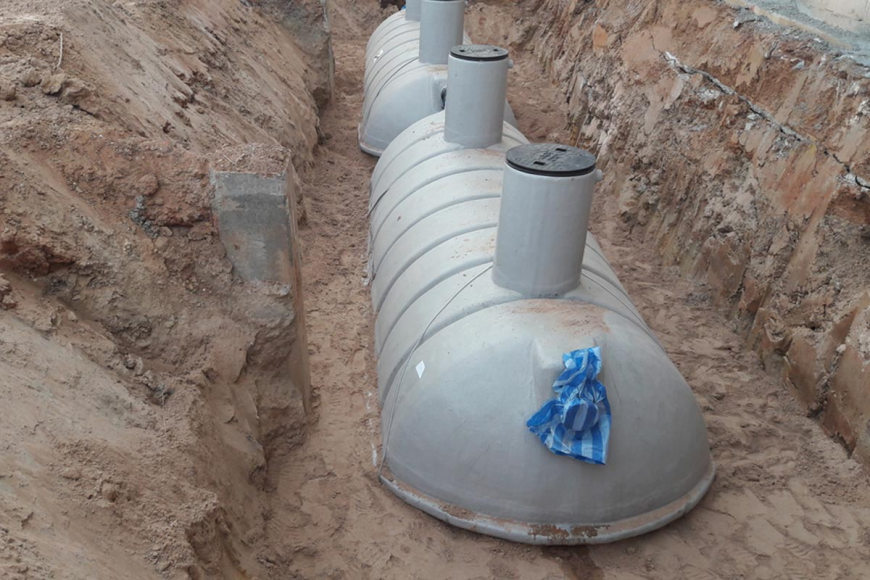
Septic Tank Installation
The heart of your system is the septic tank. It collects and separates solid waste from liquids. The tank must be placed on a stable base to prevent sinking or cracking. Most tanks are made of concrete, fiberglass, or polyethylene. Installation involves carefully lowering the tank into the excavated hole and connecting the inlet and outlet pipes. Proper alignment and leveling are key here—small mistakes can lead to backups or leaks later.
Drain Field Installation
The drain field, also called the leach field, is where the wastewater is naturally filtered into the soil. Trenches are dug and filled with gravel, and perforated pipes are placed on top. Soil is then added to cover the pipes. The layout must allow for proper drainage and avoid areas where water collects. Maintaining a healthy buffer zone around the drain field ensures it functions correctly and prevents contamination of nearby wells or water sources.
System Connection and Inspection
After the tank and drain field are in place, the pipes from your home’s plumbing system are connected to the septic system. Every connection must be watertight and properly sloped to allow gravity to move wastewater efficiently. Local authorities usually require a final inspection before covering everything with soil. This inspection verifies that the system meets safety standards and is ready for use. Passing this step is essential to avoid future problems.
Covering and Landscaping
Once the system passes inspection, it’s time to cover it with soil and finish landscaping. Avoid heavy machinery or vehicles on top of the system—it can damage the pipes. Planting grass over the area helps prevent erosion and maintains the system’s integrity. Keep trees and shrubs at a safe distance, as roots can invade and block the pipes. A well-maintained surface protects your septic system for years.
Maintenance Tips
Even a perfectly installed septic system requires care. Avoid flushing harsh chemicals, grease, or non-biodegradable items. Regular inspections and pumping every 3–5 years prevent solids from building up and clogging the system. Keep records of maintenance and watch for warning signs like slow drains, odors, or wet patches in your yard. Proper care saves money and prevents unpleasant surprises.
When to Call a Professional
Sometimes, DIY isn’t the best option. If your soil conditions are poor, your lot is small, or you’re unsure about local regulations, hiring professionals for septic system installation is smart. Experts ensure everything is installed correctly, safely, and in compliance with codes. A professional touch reduces long-term risks and gives you peace of mind. Using trusted services like septic system installation specialists can make the entire process smoother and stress-free.
FAQs
How long does a septic system installation take?
A typical installation can take anywhere from a few days to a couple of weeks depending on soil conditions, system size, and weather. Proper planning can make the process faster.
Can I plant a garden over my drain field?
It’s best to avoid deep-rooted plants over the drain field. Grass or shallow-rooted plants are safe, as roots from trees or shrubs can damage pipes.
How often should I have my septic system inspected?
Inspections are recommended at least once every 1–3 years. Tanks usually need pumping every 3–5 years, depending on household size and water usage.